[note] FastAPI
使用 PIP 安裝 fastAPI
建立虛擬環境:
# 建立名為 fastapienv 的 virtual environment
$ python -m venv fastapienv

# 啟動 fastapienv 這個 virtual environment
$ source fastapienv/bin/activate

# 檢視這個 virtual environment 中安裝了哪些套件
(fastapienv)> pip list

# 離開
(fastapienv)> deactivate
安裝 fastAPI:
(fastapienv)> pip install fastapi
(fastapienv)> pip install "uvicorn[standard]"
如果專案中已經有 requirements.txt,則可以使用下述指令來安裝套件:
$ pip install -r requirements.txt
啟動 FastAPI Server
使用 uvicorn 可以啟動 FastAPI 的應用程式:
# 進入 virtual env
$ source fastapienv/bin/activate

# 假設專案中有一支名為 books.py 的檔案
(fastapienv)> uvicorn books:app --reload

# 如果執行檔時放在 cmd 的資料夾中
(fastapienv)> uvicorn cmd.books:app --reload
除了使用 uvicorn 指令來啟動之外,也可以直接使用 fastapi CLI:
# 啟動 development mode
(fastapienv)> fastapi dev books.py

# 啟動 production mode
(fastapienv)> fastapi run books.py
定義路由注意事項
- 路由的匹配是由上而下的,上面配對到的話,下面就不會處理
- 有沒有最後的
/是不同的
舉例來說:
# 使用 `GET /books/foobar` 會進來(沒有最後的 /)
@app.get("/books/{book_title}")

# 永遠不會進來,因為上面已經被匹配到了
@app.get("/books/{book_author}")

# 使用 `GET /books/foobar/` 會進來(有最後的 /)
@app.get("/books/{book_author}/")
- 在 FastAPI 中,在 function 中所定義的變數,如果有該變數有在路由中看到,就是
path parameter,否則,就會是query parameter。
Data Validation
- 使用
pydantic中的BaseModel和Field來針對 request payload 進行 field validation - 使用
pydantic中的conint或constr可以做到,某欄位是 optional,但若使用者有給值時才進行驗證 - 使用
fastapi中的Path來針對 path parameter 進行 validation - 使用
fastapi中的Query來針對 query parameter 進行 validation
from typing import Optional

from pydantic import BaseModel, Field

class Book:
    id: int
    title: str
    author: str
    description: str
    rating: int

    def __init__(self, id: int, title: str, author: str, description: str, rating: int):
        self.id = id
        self.title = title
        self.author = author
        self.description = description
        self.rating = rating

# STEP1: 定義 request params 的型別,如果沒加 Optional 則是 Required
# STEP2: 使用 Field 可以定義 field validation rule
class BookRequest(BaseModel):
  # 把 ID 標註成 Optional
    id: Optional[int] = Field(description='ID is not needed on create', default=None)
    title: str = Field(min_length=1)
    author: str = Field(min_length=1)
    description: str = Field(min_length=1, max_length=100)
    rating: int = Field(gt=0, lt=6)


@app.post("/books")
# STEP2: 使用 request params 的型別
async def create_book(book_request: BookRequest):
    # 把 Book 從 BookRequest type 轉成 Book type
    new_book = Book(**book_request.model_dump())
    BOOKS.append(book_request)
Swagger
Request Payload
在 Swagger 中定義 Request Payload 的型別,並提供範例:
from pydantic import BaseModel


class UserRequest(BaseModel):
    email: str
    username: str
    first_name: str
    last_name: str
    password: str
    role: str

    # STEP 2:提供 swagger 中的 example request payload
    model_config = {
        "json_schema_extra": {
            "example": {
                "email": "pjchender@gmail.com",
                "username": "pjchender",
                "first_name": "PJ",
                "last_name": "Chen",
                "password": "password",
                "role": "admin",
            }
        }
    }


# STEP 1:在 user_request 中定義型別為 UserRequest,swagger 就會產生對應的 schema
@router.post("/users/", status_code=status.HTTP_201_CREATED)
async def create_user(db: db_dependency, user_request: UserRequest):
    # ...

    return UserResponse(
        #...
    )
Response Payload
在 Swagger 中定義 Response Payload 的型別,並提供範例:
from pydantic import BaseModel


class UserResponse(BaseModel):
    email: str
    username: str
    first_name: str
    last_name: str
    role: str
    is_active: bool

    # STEP 2:定義 example response payload
    model_config = {
        "json_schema_extra": {
            "example": {
                "email": "pjchender@gmail.com",
                "username": "pjchender",
                "first_name": "PJ",
                "last_name": "Chen",
                "role": "admin",
                "is_active": "true",
            }
        }
    }

# STEP 1-1:使用 response_model 讓 fastAPI 知道要根據這個作為 response body 的 schema
@router.get("/users/{user_id}/", response_model=UserResponse)
# STEP 1-2:使用 -> UserResponse(optional)
async def get_user(db: db_dependency, user_id: int) -> UserResponse:
    user = db.query(Users).get(user_id)

    if user is None:
        raise HTTPException(status_code=status.HTTP_404_NOT_FOUND, detail="User not found")

    return UserResponse(
        email=user.email,
        username=user.username,
        first_name=user.first_name,
        last_name=user.last_name,
        role=user.role,
        is_active=user.is_active,
    )
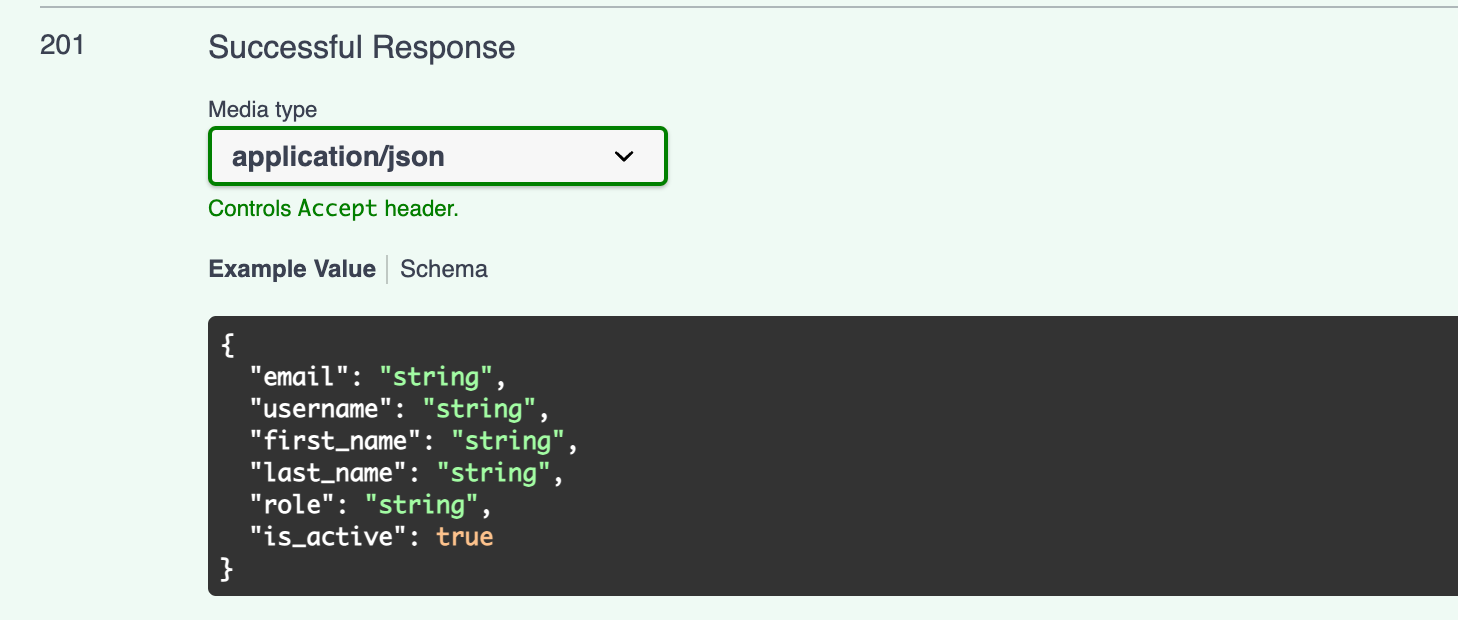
在上面這兩個例子中,如果沒有加上 Step 2,則只會把型別當成 value 填入,像是這樣:

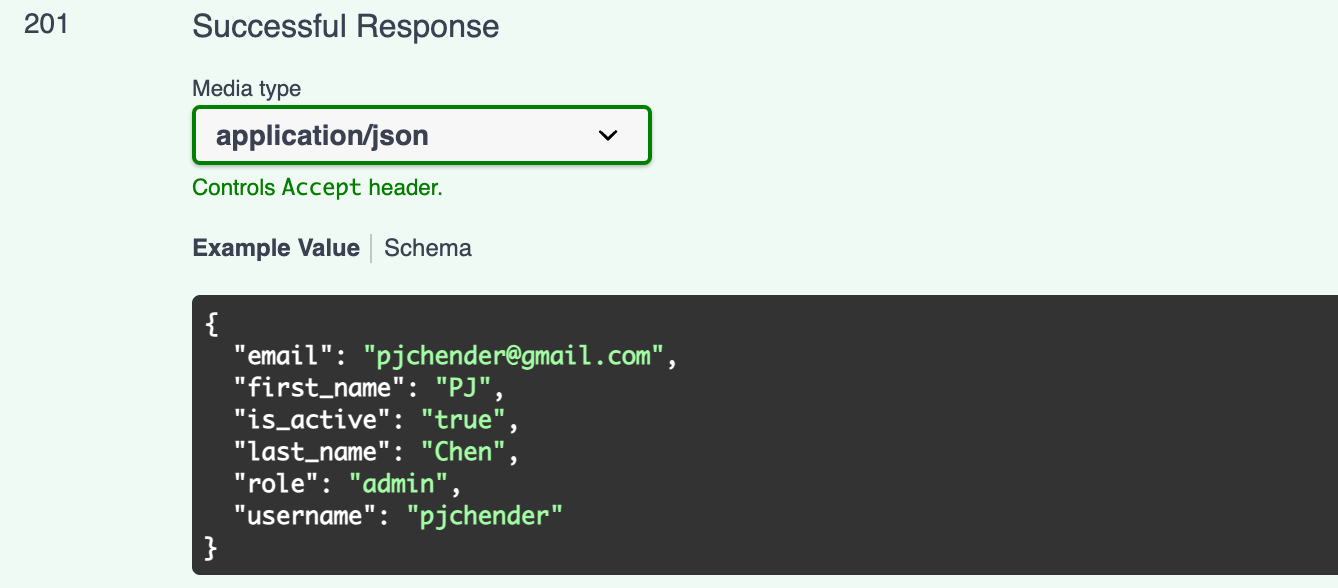
但如果有加上 Step 2,使用 model_config 明確提供 json_schema_extra 的話,則可以根據提供的範例顯示:

使用 Tag 分組
如果希望把不同的路由在 Swagger 文件中分組,可以使用 tags:
router = APIRouter(tags=["auth"])

# 不只是想做分類,連 path 都想加同一個 prefix
router = APIRouter(prefix="/auth", tags=["auth"])
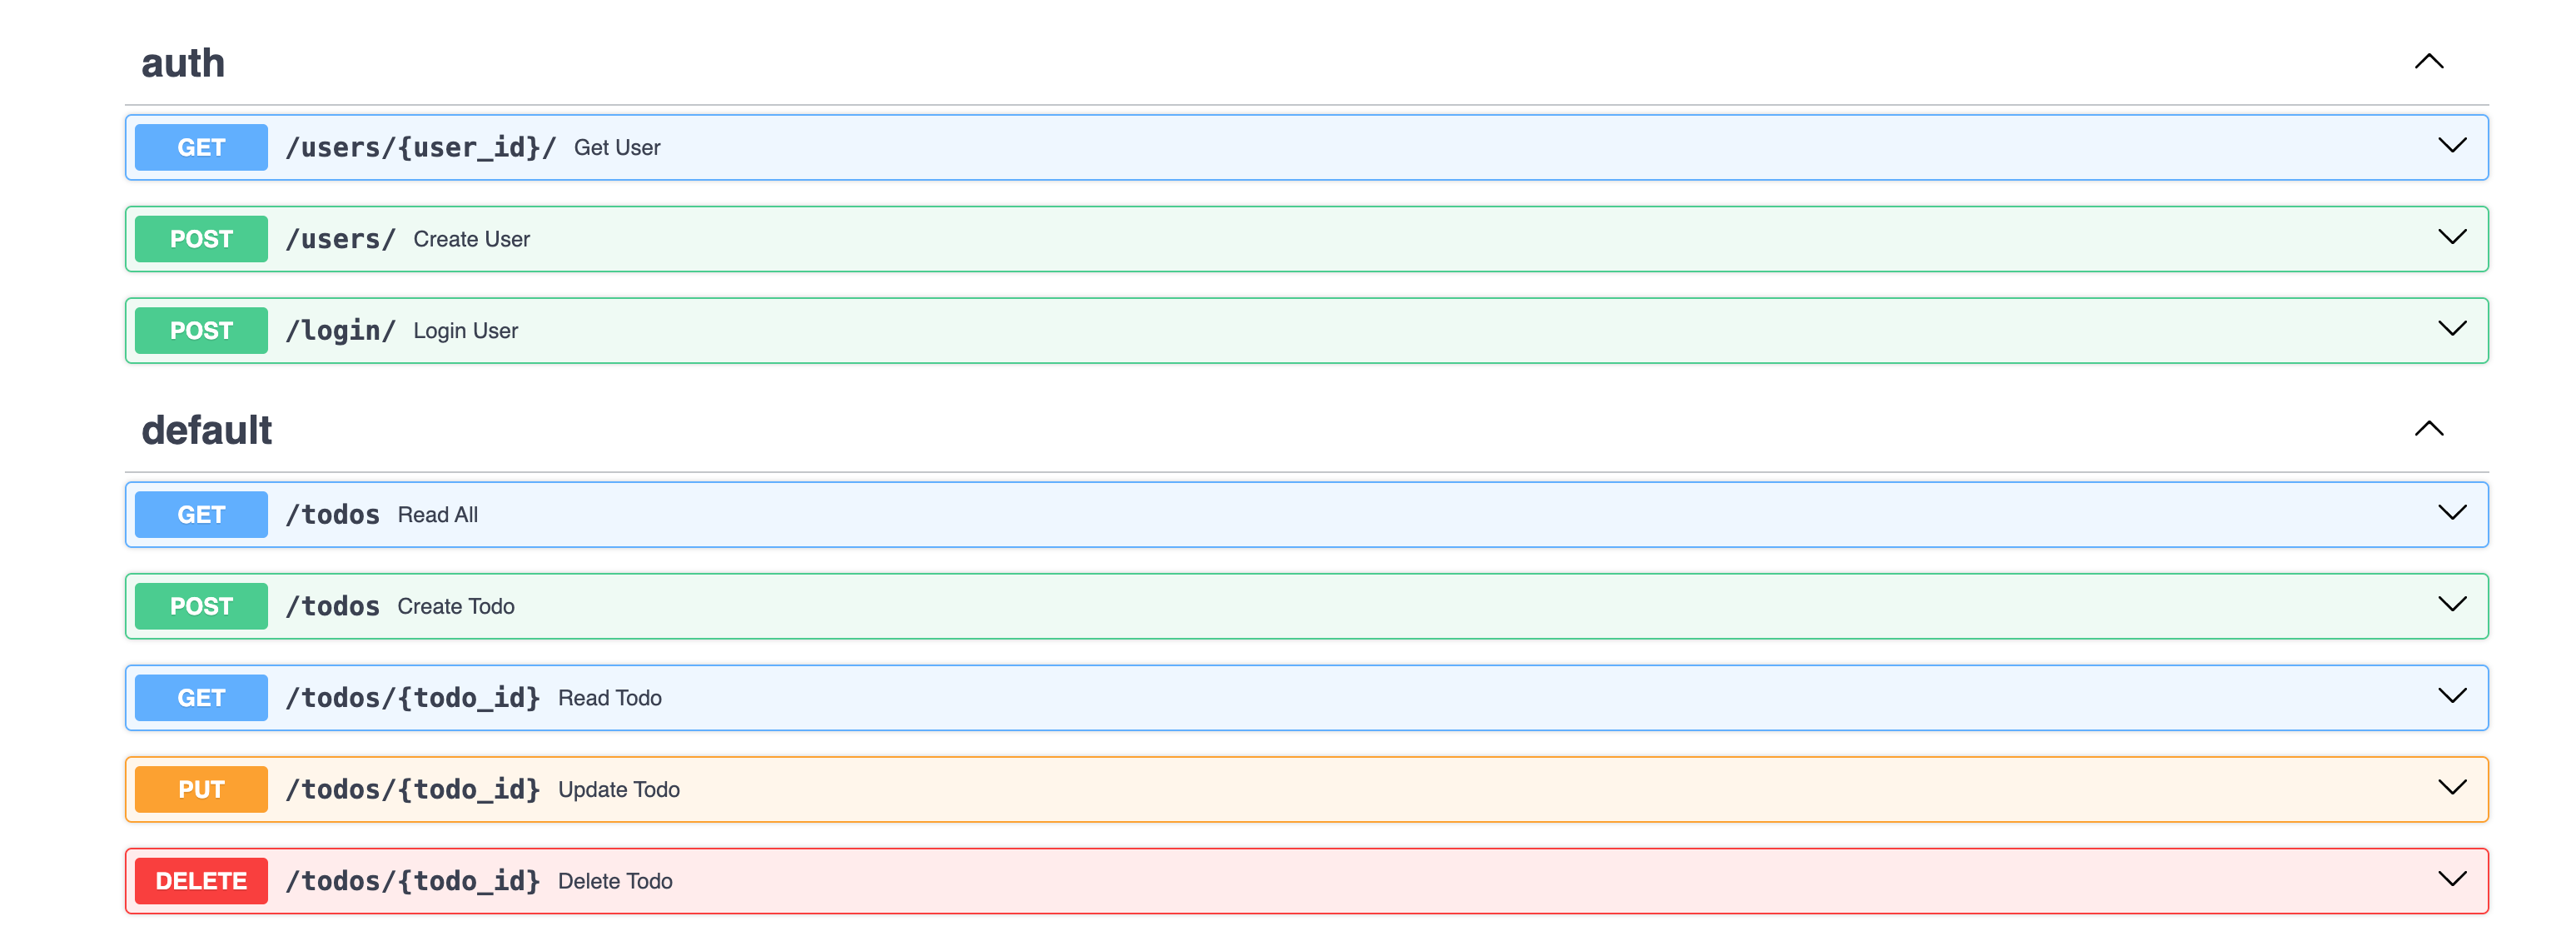
如此,後面使用這裡的 router 所定義的路由,都會歸類在 auth 中:

Nullable Field
在 Swagger 中如果要讓某個欄位明確是可以填入 null 的話,要用 Field(nullable=True) 的設定:
from pydantic import BaseModel, Field, root_validator, validator

class Model(BaseModel):
  campaign_name: str | None = Field(min_length=1)
  campaign_end_time: datetime | None = Field(nullable=True)
資訊
因為在 Swagger 中 null 並不是一個型別,所以並不會有 null type,而是只能設成 nullable。
Handle Credentials
Hashed Password
安裝套件
$ pip install passlib     # Successfully installed passlib-1.7.4
$ pip install bcrypt==4.0.1  # 需要安裝這個版本的 bcrypt 才能和 passlib 搭配使用
密碼雜湊
把密碼進行雜湊的方式:
from passlib.context import CryptContext

bcrypt_context = CryptContext(schemes=["bcrypt"], deprecated="auto")

@router.post("/users/", status_code=status.HTTP_201_CREATED)
async def create_user(db: db_dependency, user_request: UserRequest):
    user_model = Users(
        hashed_password=bcrypt_context.hash(user_request.password),
        # ...
    )

    # ...
檢查密碼
如果要檢查使用者輸入的密碼是否吻合:
def authenticate_user(username: str, password: str, db: db_dependency):
    user = db.query(Users).filter(Users.username == username).first()

    if user is None:
        return False

    if not bcrypt_context.verify(password, user.hashed_password):
        return False

    return True
JWT
安裝套件
pip install "python-jose[cryptography]"
產生 JWT
from datetime import timedelta, datetime, timezone
from jose import jwt

# The SECRET_KEY is generated the secret by "openssl rand -hex 32"
SECRET_KEY = "a788a105758e3f88e67b6cde2e1fb02ea9424d9c29eb679c7842d31c5d40f38f"
ALGORITHM = "HS256"

def create_access_token(username: str, user_id: int, expires_delta: timedelta = timedelta(hours=24)):
    to_encode = {"sub": username, "user_id": user_id}
    expires = datetime.now(timezone.utc) + expires_delta
    to_encode.update({"exp": expires})

    return jwt.encode(to_encode, SECRET_KEY, algorithm=ALGORITHM)
Login handler
from typing import Annotated

from fastapi import HTTPException, Depends
from fastapi.security import OAuth2PasswordRequestForm


class Token(BaseModel):
    access_token: str
    token_type: str


@router.post("/login/")
async def login_user(form_data: Annotated[OAuth2PasswordRequestForm, Depends()], db: db_dependency) -> Token:
    user = authenticate_user(form_data.username, form_data.password, db)
    if not user:
        raise HTTPException(
            status_code=status.HTTP_401_UNAUTHORIZED, detail="Incorrect username or password"
        )

    token = create_access_token(user.username, user.id, timedelta(hours=24))
    return Token(
        access_token=token,
        token_type="bearer",
    )
驗證 JWT
from typing import Annotated

from fastapi import APIRouter, HTTPException, Depends
from fastapi.security import OAuth2PasswordRequestForm, OAuth2PasswordBearer
from jose import jwt


oauth2_bearer = OAuth2PasswordBearer(tokenUrl="/login/")


# The SECRET_KEY is generated the secret by "openssl rand -hex 32"
SECRET_KEY = "a788a105758e3f88e67b6cde2e1fb02ea9424d9c29eb679c7842d31c5d40f38f"
ALGORITHM = "HS256"


def get_current_user(token: Annotated[str, Depends(oauth2_bearer)], db: db_dependency) -> Users:
    credentials_exception = HTTPException(
        status_code=status.HTTP_401_UNAUTHORIZED,
        detail="Could not validate credentials",
    )

    try:
        payload = jwt.decode(token, SECRET_KEY, algorithms=[ALGORITHM])
        user_id: int = payload.get("user_id")
        if user_id is None:
            raise credentials_exception
    except jwt.JWTError:
        raise credentials_exception

    user = db.query(Users).get(user_id)
    if user is None:
        raise credentials_exception

    return user
Fast API Pagination
Tips
如果一直看到這個 Error:
  File "pydantic/main.py", line 341, in pydantic.main.BaseModel.__init__
pydantic.error_wrappers.ValidationError: 3 validation errors for Page[CampaignResponseBase]
items -> 0
  value is not a valid dict (type=type_error.dict)
items -> 1
  value is not a valid dict (type=type_error.dict)
items -> 2
  value is not a valid dict (type=type_error.dict)
則需要在定義 Model 的地方加上 orm_mode=True:
class UserOut(BaseModel):
  name: str = Field(..., example="Steve")

    class Config:
        orm_mode = True
參考資料
- FastAPI - The Complete Course @ Udemy