[note] Jest 筆記
keywords: test, test-driven development, TDD
- Jest @ Official Doc
npx jest --showConfig    # 檢視設定
npx jest -- Checkbox     # 測試檔名包含 Checkbox 的檔案

npx jest --coverage      # 顯示全部的測試覆蓋率
npx jest --collectCoverageFrom="utils/**/*.{js,jsx,ts,tsx}" # 檢視某一 glob 底下的測試覆蓋率
安裝與設定
$ npm install jest --save-dev
在 package.json 中將 test 的指令改成:
// package.json
"scripts": {
  "test": "jest"  // --watch, --watchAll
},
預設情況下,Jest 會自動去找:
__tests__資料夾內的.js,.jsx,.ts,.tsx- 以
.test或.spec結尾的檔案,例如,Component.test.jsorComponent.spec.js
預設的情況下,jest 會去找專案資料夾中的 tests 資料夾:
$ mkdir __tests__
執行測試:
$ npm test -- --coverage # --coverage 會顯示覆蓋率
Jest Configuration
Jest Configuration @ official Doc
在 Jest 中使用 Babel (Import)
Using Babel @ Jest > Getting Started
預設的情況下,Jest 是在 Node 環境下執行,在 ESModule 還沒於 Node 環境普遍被支援前,可以使用 Babel。
安裝 babel 相關套件
$ npm install babel-jest @babel/core @babel/preset-env -D
新增設定檔 babel.config.js
// babel.config.js
module.exports = {
  presets: [
    [
      '@babel/preset-env',
      {
        targets: {
          node: 'current',
        },
      },
    ],
  ],
};
檢視測試覆��蓋率
檢視測試覆蓋率有兩種方式,第一種是透過指令:
$ npm test -- --coverage # --coverage 會顯示覆蓋率
第二種是在 package.json 中設定:
// package.json
"scripts": {
  "test": "jest"
},
"jest": {
  "collectCoverage": true
},
或者:
// package.json
"scripts": {
  "test": "jest --coverage"
},
基本語法
Globals @ Jest
在 Jest 中,一個基本的測試會長這樣:
- Test Suite:被
describe()包起來的部分 - Test Case:被
test()包起來的部分
describe('here is test suite', () => {
  test('here is test case', () => {
    /* here is assertions */
  });

  test.todo('...');

  test.skip('here is test case', () => {
    /* assertions */
  });

  test.only('here is test case', () => {
    /* assertions */
  });

  test.failing('here is test case', () => {
    /* assertions */
  });

  // Vitest 的話是叫 fails
  test.fails('here is test case', () => {
    /* assertions */
  });
});
在 Jest 中,test 和 it 是一樣的意思,自己選擇喜歡用的那個即可。
先把測試標題寫好
如果還沒開始撰寫測試的細節,但知道要執行那些測試項目,可以使用 test.todo(name)。
專注和略過某些測試
在 Jest 中可以使用 describe.skip() 或 test.skip() 就可以略過特定測試項目:
test.skip()等同於it.skip()、xit()、xtest()
如果只希望專注執行某些測試項目,其他都不要執行的話,可以使用 describe.only() 或 test.only():
test.only()等同於it.only()、fit()
測試會失敗的情境
某些情況下,你預期這個測試會失敗,這時候可以使用 test.failing()。
Using Matcher
- Using Matcher @ Jest Docs > Introduction
- Expect @ Jest API
常用的匹配
toBe:比對值是否相同
// toBe 使用 Object.is 來比對,若想要比對物件內容是否一樣需使用 toEqual
test('two plus two is four', () => {
  expect(2 + 2).toBe(4);
});
toEqual:比對物件內容是否相同
test('object assignment', () => {
  const data = { one: 1 };
  data['two'] = 2;
  expect(data).toEqual({ one: 1, two: 2 });
});
not:是否不同
test('adding positive numbers is not zero', () => {
  expect(1 + 3).not.toBe(0);
});
資料型別檢驗
keywords: expect.any(), expect.anyThing()
expect.anything(); // matches anything but null or undefined
expect.any(Number); // matches anything that was created with the given constructor
匹配的時候記得要使用 expect.toEqual() 的方法,例如:
const number = 3;
expect(number).toEqual(expect.any(Number));
比對布林
keywords: toBeNull, toBeUndefined, toBeDefined, toBeTruthy, toBeFalsy
test('null', () => {
  const n = null;
  expect(n).toBeNull();
  expect(n).toBeDefined();
  expect(n).not.toBeUndefined();
  expect(n).not.toBeTruthy();
  expect(n).toBeFalsy();
});

test('zero', () => {
  const z = 0;
  expect(z).not.toBeNull();
  expect(z).toBeDefined();
  expect(z).not.toBeUndefined();
  expect(z).not.toBeTruthy();
  expect(z).toBeFalsy();
});
比對數值
keywords: toBeGreaterThan, toBeGreaterThanOrEqual, toBeLessThan, toBeLessThanOrEqual, toBeCloseTo
對於浮點數(floating number)來說,應該使用 toBeCloseTo 而不要用 toBe 或 toEqual,因為可能會有進位問題:
test('adding floating point numbers', () => {
  const value = 0.1 + 0.2;
  //expect(value).toBe(0.3);           This won't work because of rounding error
  expect(value).toBeCloseTo(0.3); // This works.
});
比對物件中的屬性(object property)
keywords: toMatchObject(object), objectContaining(), toEqual()
What's the difference between '.toMatchObject' and 'objectContaining' @ stack overflow
要比對物件中的屬性可以使用 toMatchObject 或「 objectContaining() 搭配 toEqual()」 使用。一般來說,使用 toMatchObject 會是比較容易的做法。
toMatchObject:匹配物件中的部分屬性和值即可toEqual:物件中的屬性和值需要完全相同objectContaining:較少用,可能會搭配 Array 的toContain和toContainEqual的方法使用
物件內不包含物件
使用 toMatchObject 或 object.containing() 有一樣的效果。只要 matched object 的屬性都有列在 expected object 內即通過:
const schema = {
  gender: expect.any(String),
  age: expect.any(Number),
  phone: expect.anything(),
  interests: expect.any(Array),
};

test('object containing', () => {
  const data = {
    gender: 'female',
    age: 30,
    phone: '0987345672',
    interests: ['computer', 'guitar'],
    comments: 'Nothing to comment',
  };

  expect(data).toMatchObject(schema); // PASS
  expect(data).toEqual(expect.objectContaining(schema)); // PASS
});
物件內包含物件
當物件內又含有其他物件時,使用 toMatchObject 或 object.containing() 的效果不同:
- 通常用這個:使用
toMatchObject中需包含所列出的屬性和值 - 使用
objectContaining的話,需包含該物件完整的屬性和值,除非物件內又使用objectContaining去做匹配
test('nested object', () => {
  /**
   * toMatchObject
   */
  // 通過:物件內還有物件,包含完整的 props/values
  expect({ position: { x: 0, y: 0 } }).toMatchObject({
    position: {
      x: expect.any(Number),
      y: expect.any(Number),
    },
  });

  // 主要差異處!!
  // 通過:物件內還有物件,只包含部分的 props/values
  expect({ position: { x: 0, y: 0 } }).toMatchObject({
    position: {
      x: expect.any(Number),
    },
  });

  /**
   * objectContaining
   */
  // 通過:物件內還有物件,包含完整的 props/values
  expect({ position: { x: 0, y: 0 } }).toEqual(
    expect.objectContaining({
      position: {
        x: expect.any(Number),
        y: expect.any(Number),
      },
    }),
  );

  // 主要差異處!!
  // 失敗:物件內還有物件,但只包含部分的 props/values,而沒有再定義 expect.objectContaining
  expect({ position: { x: 0, y: 0 } }).toEqual(
    expect.objectContaining({
      position: {
        x: expect.any(Number),
      },
    }),
  );

  // 通過:物件內還有物件,但物件屬性內又定義 objectContaining
  expect({ position: { x: 0, y: 0 } }).toEqual(
    expect.objectContaining({
      position: expect.objectContaining({
        x: expect.any(Number),
      }),
    }),
  );
});
比對字串(透過正規式)
keywords: toMatch
test('there is no I in team', () => {
  expect('team').not.toMatch(/I/);
});

test('but there is a "stop" in PJCHENder', () => {
  expect('PJCHENder').toMatch(/stop/);
});
判斷回傳的是否為字串:
test('but there is a "stop" in PJCHENder', () => {
  expect('PJCHENder').toEqual(expect.any(String));
});
比對陣列是否包含
keywords: toContain, toContainEqual
判斷陣列中是否包含**某一元素(原生值)**時,可以使用 toContain:
const shoppingList = ['diapers', 'kleenex', 'trash bags', 'paper towels', 'beer'];

test('the shopping list has beer on it', () => {
  expect(shoppingList).toContain('beer');
  expect(new Set(shoppingList)).toContain('beer');
});
判斷陣列中是否包含某一物件,可以使用 toContainEqual:
const users = [
  { name: 'aaron', email: 'aaron@gmail.com' },
  { name: 'pjchender', email: 'pjchender@gmail.com' },
];

expect(users).toContainEqual({ name: 'aaron', email: 'aaron@gmail.com' });
如果是要判斷陣列中是否包含某一物件中的部分屬性,可以使用 toContainEqual 搭配 expect.objectContaining(),例如:
const users = [
  { name: 'aaron', email: 'aaron@gmail.com' },
  { name: 'pjchender', email: 'pjchender@gmail.com' },
];

// expect(users).toContainEqual({ name: 'aaron' }); // wrong: deep equality
expect(users).toContainEqual(
  expect.objectContaining({
    name: 'aaron',
  }),
);
例外處理(Exception)
keywords: toThrow, toThrowError
function compileAndroidCode() {
  throw new ConfigError('you are using the wrong JDK');
}

test('compiling android goes as expected', () => {
  expect(compileAndroidCode).toThrow();
  expect(compileAndroidCode).toThrow(ConfigError);

  // You can also use the exact error message or a regexp
  expect(compileAndroidCode).toThrow('you are using the wrong JDK');
  expect(compileAndroidCode).toThrow(/JDK/);
});
Mock Functions
Mock Functions @ Jest Docs > Introduction
// TL;DR
const mockFn = jest.fn(() => customImplementation);
expect(mockFn).toHaveBeenCalled();
基本使用
keywords: jest.fn(<implementation>)
若想要測試一個函式,透過 Mock Functions 可以檢驗該函式被呼叫了幾次、帶入的參數為何、回傳的結果為何等等。只需透過 jest.fn 即可建立 Mock Functions,並透過此函式的 mock 屬性即可看和此函式有關的訊息:
💡
jest.fn(implementation)只是jest.fn().mockImplementation(implementation)的縮寫。
// 使用 jest.fn(<implementation>) 建立 Mock Function

it('mockCallback', () => {
  // 建立 Mock Functions,取名為 mockCallback
  const mockCallback = jest.fn((x) => 42 + x);
  [0, 1].forEach(mockCallback);

  // 檢查該函式被呼叫了幾次
  expect(mockCallback.mock.calls.length).toBe(2);

  // 該函式第一次被呼叫時的第一個參數為 0
  expect(mockCallback.mock.calls[0][0]).toBe(0);

  // 該函式第二次被呼叫時的第一個參數為 1
  expect(mockCallback.mock.calls[1][0]).toBe(1);

  // 該函式第一次被呼叫時的回傳值是 42
  expect(mockCallback.mock.results[0].value).toBe(42);
});
Mock Function 預設會回傳 undefined:
// jest.fn 預設回傳 undefined
it('default mock function', () => {
  const myMock = jest.fn();
  expect(myMock()).toBe(undefined);
});
設定回傳值(mock return values)
keywords: mockReturnValueOnce, mockReturnValue
透過 Mock Function 的 API 可以去修改 mock function 的回傳值,讓每一次呼叫得到不同的回傳值:
it('default mock function', () => {
  const myMock = jest.fn();
  expect(myMock()).toBe(undefined);

  // 透過 mockReturnValueOnce 來設定該 Function 每次呼叫後會回傳的值
  myMock.mockReturnValueOnce(10).mockReturnValueOnce('x').mockReturnValue(true);

  expect(myMock()).toBe(10);
  expect(myMock()).toBe('x');
  expect(myMock()).toBeTruthy();
});
Mock 第三方套件(mocking modules)
keywords: jest.mock(<package>), __mocks__
假設我們使用 node-fetch 這個套件,但我們不想要真的向 API 發送請求,而是想要模擬回傳的結果,可以使用 jest.mock(<package>) 來自動模擬 node-fetch 套件。步驟如下:
- 先找出「原程式」中要 Mock 的 module,例如
fetch - 在「測試檔」中載入要被 Mock 的 module,例如
import fetch from 'node-fetch'; - 在「測試檔」中使用
jest.mock<path_or_name>來 mock 該 module - (TS Optional)使用 mockFunction 這個 utility 或使用 Type Assertion
- 在「測試檔」中,撰寫該 function 的 mock return value,例如,
fetch.mockResolvedValue(users) - 在「原程式」中確認該 function 執行的回傳值是 mock 後的結果
// users.test.js
import fetch from 'node-fetch';

// 模擬 node-fetch 這個套件
jest.mock('node-fetch');

// 使用模擬後的 fetch 方法
it('mock modules and async', async () => {
  const users = [{ name: 'Bob' }];

  // fetch 會自動 mock 成 jest.fn(),將可以使用所有 mockFn 提供的方法
  const fetchMock = fetch.mockResolvedValue(users);
  const response = await fetchMock(); // 記得要執行 fetchMock() 才會有值
  expect(response).toEqual(users);
});
透過 jest.mock 模擬的內容只會作用在該隻測試檔案中,其他測試檔案即使使用的相同的套件也不會受影響(參考:jest.mock)。
另一種作法是建立一個名為 __mocks__ 的資料夾,在裡面建立要 mock 的套件,例如 ./__mocks__/node-fetch.js,jest 會自動用寫在 __mocks__ 中與套件同名的檔案來 mock。
模擬套件中的某個方法
在 useAutofillPromo 這個套件中會使用到 next/router 中的 useRouter 方法,為了進行測試,需要模擬 next/router 這個套件中的 useRouter 方法。
如果是希望整隻測試檔都套用相同的 mock value 的話,可以這樣寫:
// useAutofillPromo.test.tsx

jest.mock('next/router', () => ({
  useRouter() {
    return {
      query: {
        PromoCode: 'foo',
      },
    };
  },
}));

describe(() => {
  /* ... */
});
如果是希望在不同的 test case 中有不同的 mock value 的話,可以這樣寫:
// useAutofillPromo.test.tsx
// @ts-nocheck
import * as nextRouter from 'next/router';

// 模擬 nextRouter 中的 useRouter 方法
// nextRouter.useRouter 將可以使用所有 mockFn 提供的方法
nextRouter.useRouter = jest.fn();

describe('useAutofillPromo', () => {
  afterEach(() => {
    // 使用 mockReset 可以把每次 mock 的 value 清空
    nextRouter.useRouter.mockReset();
  });

  it('get promoCode after invoking refreshAutofillPromo', () => {
    // 把該 function 會回傳的值進行模擬
    nextRouter.useRouter.mockImplementation(() => ({
      query: {
        PromoCode: 'foo',
      },
    }));

    // 也可以使用 mockReturnValue()
    // nextRouter.useRouter.mockReturnValue({
    //  query: {
    //    PromoCode: 'foo',
    //  },
    // });

    // useAutofillPromo 中呼叫到的 useRouter 會是 mock 過的
    const { result } = renderHook(() => useAutofillPromo());
    // ...
  });
});
要看 mock 回傳的結果是什麼,最簡單的方式就是到原本就會呼叫改 mock module 的檔案中去把它 console 出來,也就是這裡的 useAutofillPromo:
// useAutofillPromo.tsx
const useAutofillPromo = () => {
  const router = useRouter();
  // 直接 console.log,就能知道有沒有 mock 成功,還有 mock 的結果為何
  console.log('[useAutofillPromo]', { router });

  // ...
};
要看 mock module 回傳的值,最快的方式,就是到原本就會呼叫改 mock module 的檔案中去把它 console 出來,也可以清楚知道每次 mock 的 value 有沒有被清空。
Spy on Methods
檢視更多使用 Mock 和 Spy 的說明:vi.spyOn。
Spy 和 MockFunction 的差別在於,如果是用 Mock 的話,該 function 會失去原本的功能,需要自己 Implement,但 Spy 比較像是原本的 function 還是可以繼續用,但觀察這個 function 如何被使用:
// 不改�變原本 method 的實作
const mockFn = jest.spyOn(object, methodName);
// 如果希望不要使用執行原本的方法,可以搭配 mockImplementation
const mockFn = jest.spyOn(object, methodName).mockImplementation(() => customImplementation);
// 或者改用 replaceProperty 也可以
const mockFn = jest.replaceProperty(
object,
methodName,
jest.fn(() => customImplementation),
);
也可以用 Spy 的方式來 Mock,如此原本 function 的實作會被保留:
import { calculator } from './src/calculator.ts'

vi.mock('./src/calculator.ts', { spy: true })
清除 Mock 的方式
keywords: clear、restore、reset
-
clear:mockFn 的 state 都會回到初始狀態,但不會 reset 這個 function 的 implementation
- 針對單一 MockFn:mockClear
- 針對所有:vi.clearAllMocks
- config:clearMocks
-
restore:mockFn 的 state 都會回到初始狀態,且會 reset 這個 function 的 implementation
- 針對單一 MockFn:mockRestore
- 針對所有:vi.restoreAllMocks
- config:restoreMocks
-
reset:把 mockFn 整個清空,原本的 implementation 也會被清空(變成
undefined)-
針對單一 MockFn:mockReset
-
針對所有:vi.resetAllMocks
-
config: mockReset
-
Mock Time
- Fake Timers @ Jest > Jest Object
- Using Fake Timers @ testing-library/react
beforeEach(() => {
  // vi.setSystemTime(1687072779984);
  jest.useFakeTimers({
    now: 1687072779984,
  });
});

afterEach(() => {
  jest.useRealTimers();
});
模擬非同步的回傳結果(Mock Resolved Value)
mockFn.mockResolvedValue(value)mockFn.mockResolvedValueOnce(value)mockFn.mockRejectedValue(value)mockFn.mockRejectedValueOnce(value)
// users.test.js
const fetch = require('node-fetch');

// 模擬 node-fetch 這個套件
jest.mock('node-fetch');

// 使用模擬後的 fetch 方法
it('mock modules and async', async () => {
  const users = [{ name: 'Bob' }];

  // 模擬後的 fetch 方法可以使用 mockResolvedValue 這個方法
  // 產生一個會回傳 Promise 的函式
  const fetchMock = fetch.mockResolvedValue(users);
  const response = await fetchMock(); // 記得要執行 fetchMock() 才會有值

  expect(response).toEqual(users);
});
模擬回呼函式(callback function with mock implementation)
mock implementations @ Jest Docs
假設有一個函式中帶有 callback function:
// session.connection 這個方法帶有兩個參數
// 第一個是 token;第二個是 callback function

connect(token, (error) => {
  if (error) {
    handleError(error);
  } else {
    const connectionId = session.connection.connectionId;
    action.update({
      connectionId,
      isSessionConnected: true,
    });
  }
});
撰寫測試時可以這樣透過 mockFn.mockImplementation() 的方式,例如:
// 第一個參數帶 token,第二個帶 callback function
// 其中執行時帶入的參數 null,就會變成實際上 callback function 中 error 的值
const connect = jest.fn((token, completeHandler) => completeHandler(null));
驗證 Mock Function 如何被使用
mockFn.mock.callsmockFn.mock.resultsmockFn.mock.instancesmockFn.mockImplementation(fn)mockFn.mockImplementationOnce(fn)
方便易用的方法:
// 該 mock 函式至少被呼叫過一次
expect(mockFunc).toHaveBeenCalled();

// 該 mock 函式至少被呼叫一次,並且帶有特定的參數
expect(mockFunc).toHaveBeenCalledWith(arg1, arg2);

// 該 mock 函式最後一次被呼叫時帶有特定的參數
expect(mockFunc).toHaveBeenLastCalledWith(arg1, arg2);

// All calls and the name of the mock is written as a snapshot
expect(mockFunc).toMatchSnapshot();
使用原生的 mock 物件做比對:
// 該 mock 函式至少被呼叫過一次
expect(mockFunc.mock.calls.length).toBeGreaterThan(0);

// 該 mock 函式至少被呼叫一次,並且帶有特定的參數
expect(mockFunc.mock.calls).toContainEqual([arg1, arg2]);

// 該 mock 函式最後一次被呼叫時帶有特定的參數
expect(mockFunc.mock.calls[mockFunc.mock.calls.length - 1]).toEqual([arg1, arg2]);

// 該 mock 函式最後一次被呼叫時的第一個參數是 42
// (note that there is no sugar helper for this specific of an assertion)
expect(mockFunc.mock.calls[mockFunc.mock.calls.length - 1][0]).toBe(42);

// A snapshot will check that a mock was invoked the same number of times,
// in the same order, with the same arguments. It will also assert on the name.
expect(mockFunc.mock.calls).toEqual([[arg1, arg2]]);
expect(mockFunc.getMockName()).toBe('a mock name');
測試非同步程式碼(Testing Asynchronous Code)
Testing Asynchronous Code @ Jest Docs > Introduction
promise
若使用的是 promise 可以直接將該 promise 在 test 的函式中 return 出來,Jest 會等待該 promise 被 resolve 後才繼續,若該 promise 被 reject,則該測試會自動失敗:
const fetchData = require('./../modules/fetchData');

const schema = {
  userId: expect.any(Number),
  id: expect.any(Number),
  title: expect.any(String),
  completed: expect.any(Boolean),
};

test('fetch data with json placeholder', () => {
  return fetchData('https://jsonplaceholder.typicode.com/todos/1').then((data) => {
    expect(data).toMatchObject(schema);
  });
});
async...await
const fetchData = require('./../modules/fetchData');

const schema = {
  userId: expect.any(Number),
  id: expect.any(Number),
  title: expect.any(String),
  completed: expect.any(Boolean),
};

test('fetch data with json placeholder', async () => {
  expect.assertions(1);
  try {
    const data = await fetchData('https://jsonplaceholder.typicode.com/todos/1');
    expect(data).toMatchObject(schema);
  } catch (e) {
    expect(e).toMatch('error');
  }
});
callbacks
如果測試的程式碼中有非同步的操作,可以在 test 的函式中帶入參數 done,如此 jest 會等到 done() 被執行時才結束測試;若 done() 一直沒有被呼叫到,則顯示測試失敗。
test('fetch data with json placeholder', (done) => {
  fetchData('https://jsonplaceholder.typicode.com/todos/1')
    .then((data) => {
      expect(data).toMatchObject(schema);
      done();
    })
    .catch((error) => done(error));
});
重複某一行為(Setup and Teardown)
keywords: beforeEach, beforeAll, afterEach, afterAll
setup and teardown @ Jest
開始測試前,常會有一些前置的操作或設定要先被執行,這裡 Jest 提供一些 helpers 來方便使用。
每個測試前都要重複執行(repeating setup for many tests)
如果你有一些前置動作是要在許多測試前都要重複執行的,那麼可以使用 beforeEach 和 afterEach:
// 在每一個 test 前都會先執行 beforeEach,test 後都會執行 afterEach
beforeEach(() => {
  initializeCityDatabase();
});

afterEach(() => {
  clearCityDatabase();
});

test('city database has Vienna', () => {
  expect(isCity('Vienna')).toBeTruthy();
});

test('city database has San Juan', () => {
  expect(isCity('San Juan')).toBeTruthy();
});
測試前執行一次(One-Time Setup)
有些時候,這些設定只需要在開始前後(所有 test 執行前後)執行一次就好,這時候可以使用 beforeAll 和 afterAll 的方法:
// 在所有 test 執行前先執行 beforeAll;所有 test 執行完後再執行 afterAll
beforeAll(() => {
  return initializeCityDatabase();
});

afterAll(() => {
  return clearCityDatabase();
});

test('city database has Vienna', () => {
  expect(isCity('Vienna')).toBeTruthy();
});

test('city database has San Juan', () => {
  expect(isCity('San Juan')).toBeTruthy();
});
Scope
預設的情況下,before 和 after 會套用到一個檔案中的所有測試(test),透過 describe 你可以把這些測試分成不同區塊,在 describe 區塊中使用的 before 和 after 只會在該區塊內有作用。
// beforeAll, afterAll 會在該檔案中的所有 test 前後執行
beforeAll(() => console.log('1 - beforeAll'));
afterAll(() => console.log('1 - afterAll'));

// beforeEach, afterEach 會在該檔案中的每一個 test 前後執行
beforeEach(() => console.log('1 - beforeEach'));
afterEach(() => console.log('1 - afterEach'));

test('', () => console.log('1 - test'));

describe('Scoped / Nested block', () => {
  // 這裡的 before, after 只會作用在此 block 內
  beforeAll(() => console.log('2 - beforeAll'));
  afterAll(() => console.log('2 - afterAll'));
  beforeEach(() => console.log('2 - beforeEach'));
  afterEach(() => console.log('2 - afterEach'));
  test('', () => console.log('2 - test'));
});

// 1 - beforeAll
// 1 - beforeEach
// 1 - test
// 1 - afterEach

// 2 - beforeAll
// 1 - beforeEach
// 2 - beforeEach
// 2 - test
// 2 - afterEach
// 1 - afterEach
// 2 - afterAll
// 1 - afterAll
測試事件(Event and EventEmitter)
若要測試事件,可以使用 Node.js 中提供的 Event 和 EventEmitter。
例如要測試第三方套件的 session 物件,該物件有 on, off 和 dispatch 事件:
// session.js
// 建立第三方套件 session 的 mock modules
const EventEmitter = require('events');
const sessionEvent = new EventEmitter();

const session = {
  dispatch: jest.fn((type) => {
    sessionEvent.emit(type);
  }),
  on: jest.fn((type, callback) => {
    sessionEvent.on(type, callback);
  }),
  off: jest.fn((type, callback) => {
    sessionEvent.off(type, callback);
  }),
};

module.exports = session;
測試時:
// session.test.js
const sessionEvent = require('./session');

it('test sessionEvent', () => {
  const eventHandler = jest.fn();
  sessionEvent.on('eventName', eventHandler);
  expect(eventHandler.mock.calls.length).toBe(0);

  sessionEvent.dispatch('eventName');
  expect(eventHandler.mock.calls.length).toBe(1);
});
Custom Matcher
exoect,extend(matchers) @ Jest Expect
有些時候我們會重複執行相同的 query,例如,檢驗表單中是否包含某個 label:
test('render App', () => {
  render(<App />);
  const form = screen.getByRole('form');
  const label = within(form).queryByLabelText('Name');
  expect(label).toBeInTheDocument();
});
如果要一直重複同樣的 query 和 assert 只為了檢查不同的 label,其實蠻麻煩的,這時候可以寫一個 custom matcher:
function toContainLabel(container: HTMLElement, labelText: string) {
  const label = within(container).queryByLabelText(new RegExp(labelText, 'i'));
  if (!label) {
    screen.debug(container);
    return {
      pass: false,
      message: () => `the form did not contain the label ${labelText}`,
    };
  }

  return {
    pass: true,
    message: () => `the form did not contain the label ${labelText}`,
  };
}

// 把 Custom Matcher 加到 Jest 中
expect.extend({ toContainLabel });
然後就可以在我們的測試中使用新寫好的這個 matcher:
test('render App', () => {
  render(<App />);
  const form = screen.getByRole('form');

  // 使用 Custom Matcher
  expect(form).toContainLabel('Name');
  expect(form).toContainLabel('age');
});
效能(Performance)
檢視效能問題
檢視 Profiler 的步驟:
- 打開 Chrome,在網址列輸入
chrome://inspect/,接著點擊「Open dedicated DevTools for Node」 - 進到 Terminal,執行:
# Jest
node --inspect-brk ./node_modules/jest/bin/jest.js src/components/testComponent/TestComponent.test.tsx --runInBand

# Vitest
node --inspect-brk ./node_modules/vitest/vitest.mjs src/components/testComponent/TestComponent.test.tsx --single-thread
建議或應避免的設定
ts-jest
如果有用 ts-jest 的話,建議把它 type-check 的功能關掉,讓 TypeScript 的 compiler 去檢查型別就好,不要再測試的時候又執行型別檢查。
要關閉 ts-jest 型別檢查的功能,只需要:
// https://kulshekhar.github.io/ts-jest/docs/getting-started/options/isolatedModules
import type { JestConfigWithTsJest } from 'ts-jest'

const jestConfig: JestConfigWithTsJest = {
 // ...
  transform: {
    // '^.+\\.[tj]sx?$' to process js/ts with `ts-jest`
    // '^.+\\.m?[tj]sx?$' to process js/ts/mjs/mts with `ts-jest`
    '^.+\\.tsx?$': [
      'ts-jest',
      {
        isolatedModules: true,
      },
    ],
  },
}

export default jestConfig
只執行有變更的檔案
一般來說,在發 PR 前,只需要測試有變更到的檔案即可,不需要跑完整的測試。我們可以透過 jest --onlyChanged 或 jest --changedSince 來達到。
範例程式碼
describe('Filter function', () => {
  test('it should filter by a search term(link)', () => {
    // actual test
    const input = [
      { id: 1, url: 'https://www.url1.dev' },
      { id: 2, url: 'https://www.url2.dev' },
      { id: 3, url: 'https://www.link3.dev' },
    ];

    const output = [{ id: 3, url: 'https://www.link3.dev' }];

    expect(filterByTerm(input, 'LINK')).toEqual(output);
  });
});

function filterByTerm(inputArr, searchTerm) {
  return inputArr.filter((item) => item.url.match(searchTerm));
}
常見問題
ReferenceError: document is not defined

可以透過 npx jest --showConfig 檢查 testEnvironment 是不是 jsdom,如果不是的話可以在 config 檔中加上:
// jest.config.js
module.exports = {
+  testEnvironment: 'jsdom',
};
或者透過 CLI 指定:
npx jest --env=jsdom
無法處理 node_modules 中的 svg 檔案
Jest cannot load svg file @ StackOverflow
預設的情況下,Jest 不會處理 node_modules 中的檔案,這時候需要使用 moduleNameMapper 的設定:
// jest.config.js
moduleNameMapper: {
  '^.+\\.svg$': '<rootDir>/internal/mocks/fileTransformer.js',
},
fileTransformer 的寫法可以參考 Jest 官網中的:Using with webpack > Mocking CSS Modules:
// fileTransform.js
const path = require('path');

module.exports = {
  process(_, filename) {
    return `module.exports = ${JSON.stringify(path.basename(filename))}`;
  },
};
如果是無法處理自己 App 中的 svg 檔案,則是要使用 Jest Config 中的 transform 這個 options。
分不清楚 ESM 或 CJS 而無法載入第三方套件
有些套件沒有定義清楚其提供的檔案中,那個是 ESM、那個是 CJS,這可能會使得 Jest 在執行時出現以下錯誤:
Jest encountered an unexpected token
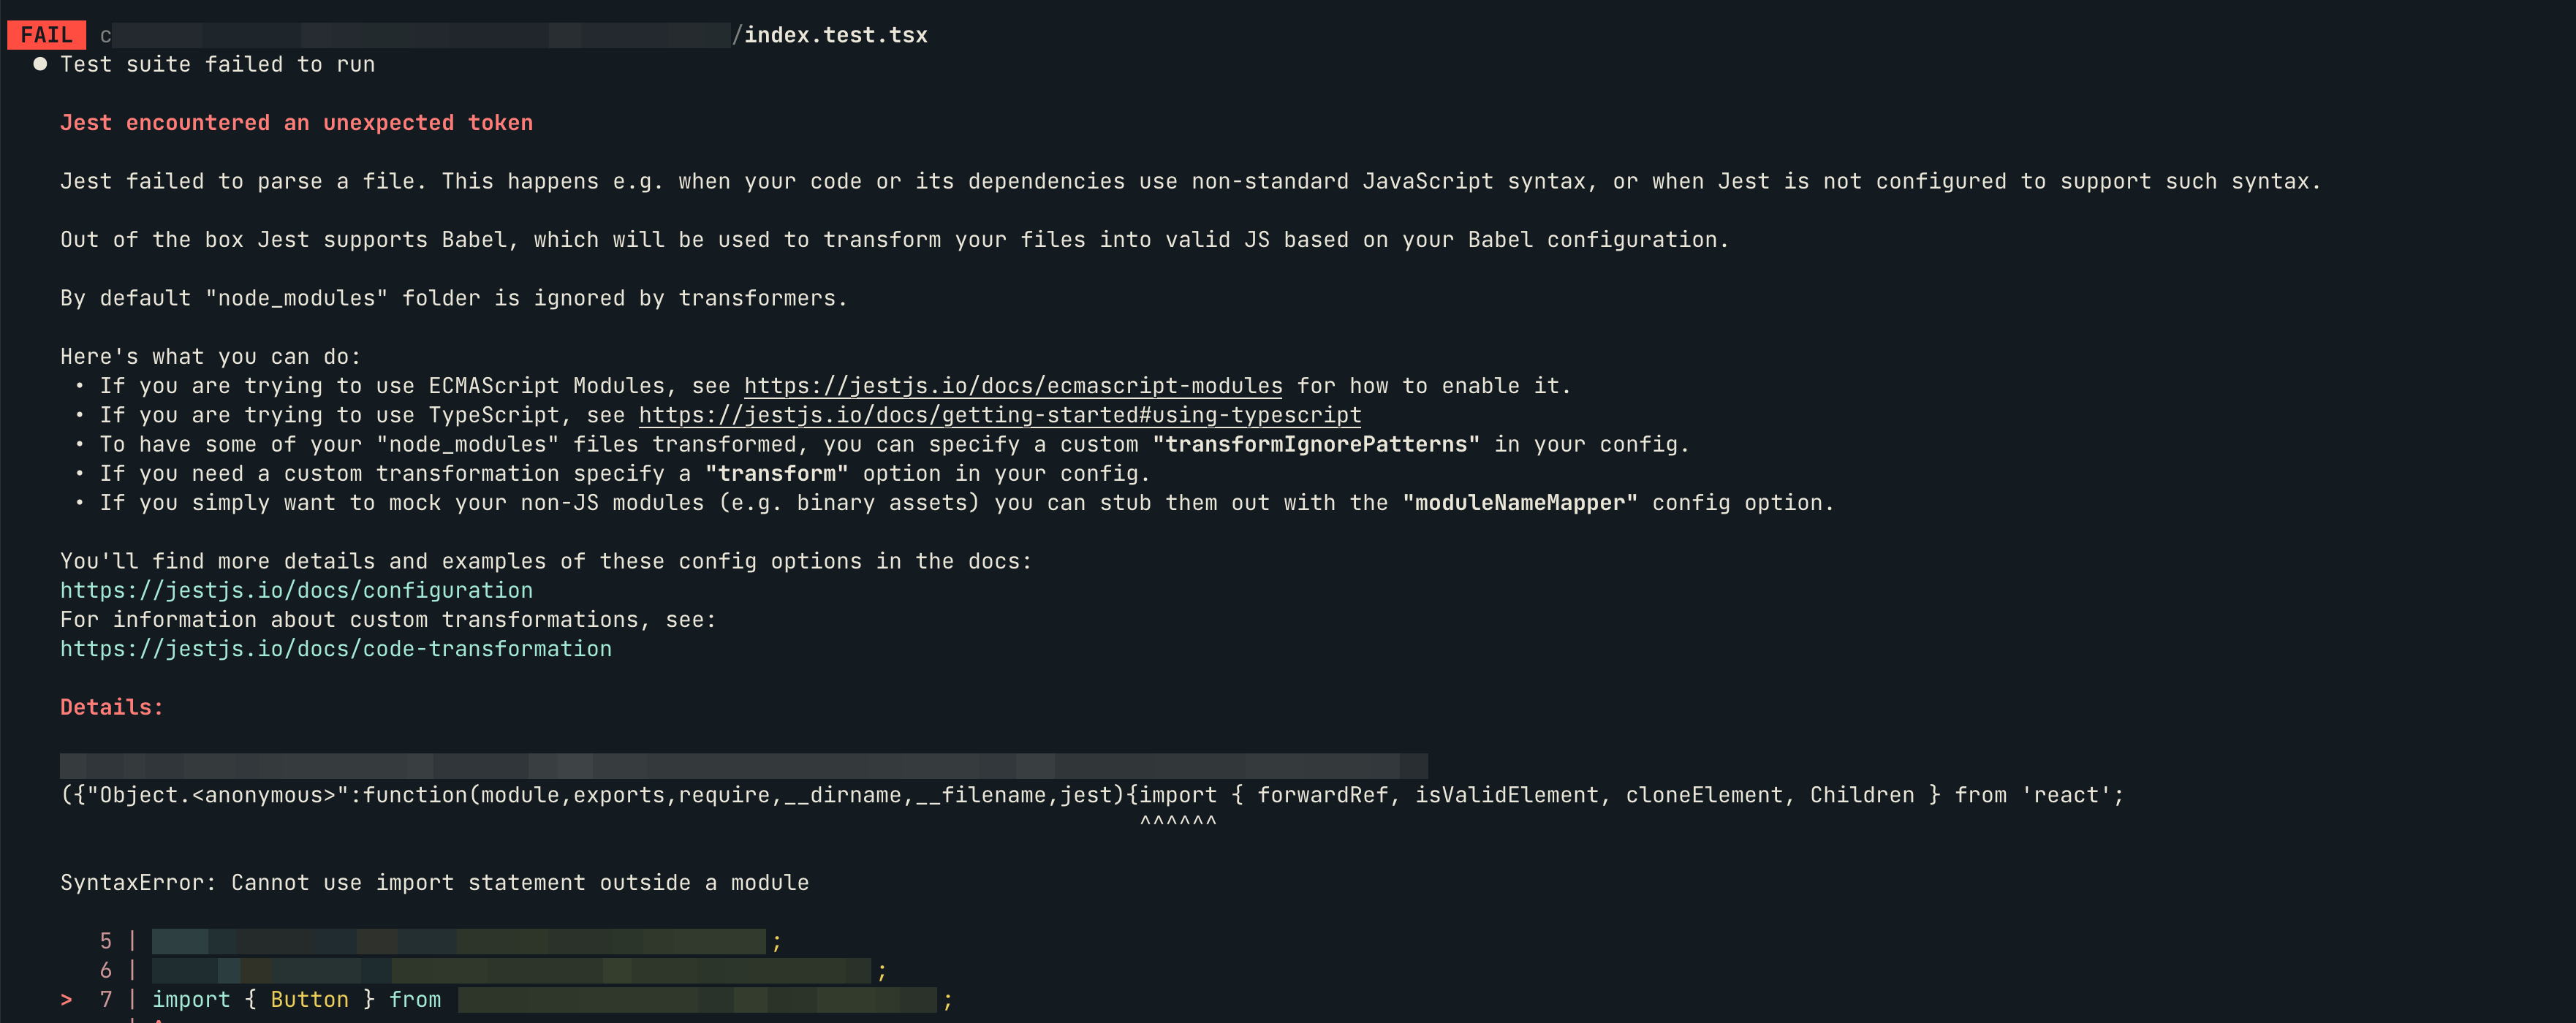
這個錯誤有可能是因為 Jest 去載了 ESM 的檔案,但因為預設 Jest 用的是 CSM,所以它無法解析這個語法。如果該 package owner 的 owner 沒有能更清楚定義 ESM 和 CJS 的 entry point,我們可以在 jest.config.js 透過 moduleNameMapper 來做到類似「轉址」的動作:
// jest.config.js
const config: Config = {
  // ...
  moduleNameMapper: {
    // https://jestjs.io/docs/webpack#mocking-css-modules
    '\\.(css|scss)$': 'identity-obj-proxy',

    // import alias
    '^@tests(.*)$': '<rootDir>/tests$1',

    // handle module resolve not correct
    '^pkg-name': 'pkg-name/dist/index.cjs',
    '^pkg-name/(.+)$': 'pkg-name/$1/index.cjs',
  },
};
API Reference
Mock Functions
Mock Functions @ Jest API
jest.fn(implementation)jest.isMockFunction(fn)jest.spyOn(object, methodName)jest.spyOn(object, methodName, accessType?)jest.clearAllMocks()jest.resetAllMocks()jest.restoreAllMocks()mockFn.getMockName()mockFn.mock.callsmockFn.mock.resultsmockFn.mock.instancesmockFn.mockClear()mockFn.mockReset()mockFn.mockRestore()mockFn.mockImplementation(fn)mockFn.mockImplementationOnce(fn)mockFn.mockName(value)mockFn.mockReturnThis()mockFn.mockReturnValue(value)mockFn.mockReturnValueOnce(value)mockFn.mockResolvedValue(value)mockFn.mockResolvedValueOnce(value)mockFn.mockRejectedValue(value)mockFn.mockRejectedValueOnce(value)
Jest Object
The Jest Object @ Jest API
Mock Modules
jest.disableAutomock()jest.enableAutomock()jest.genMockFromModule(moduleName):產生一個 mocked 版本的 modulejest.mock(moduleName, factory, options)jest.unmock(moduleName)jest.doMock(moduleName, factory, options)jest.dontMock(moduleName)jest.setMock(moduleName, moduleExports)jest.requireActual(moduleName)jest.requireMock(moduleName)jest.resetModules()jest.isolateModules(fn)